Saturday 21 March 2015

SDC 187 Neon

Stampotique Designers Blog challenge for this week is to use neon. This is what the host Astrid Stulemeijer has us say:
At first I was a bit afraid of these intense colours, but after using them, I really love them.  They give your work such a nice "pop".  I challenge you to use at least one neon colour.  Can't wait to see your eye popping work!

A challenge indeed as i wasn’t sure if i owned any neon colours and i don’t find them easy to work with.

Off the check on my stash and found a piece of background card i had over from the taster day i went to at AFTH in February which is very bright, cut out an ATC sized card from it.

P1080239

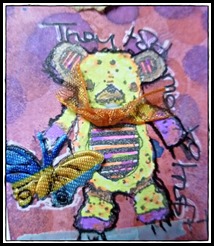
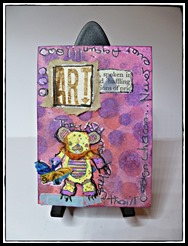
Decided to use Teddy from Stampotique as my muse. Found some very old neon pens in my stash, coloured Teddy in but didn’t fussy cut him out just the basic shape, i stamped him again directly onto the ATC and then adhered the coloured in version over the top.

Sat looking at him for a while then hand wrote the words ‘They told me to trust their design choices. Never ever again…’ Added a bow and a butterfly handbag.

Drew some little white circles on the edge then outlined them using a UniBall Pen, found an old stamp which i partially stamped just for the word Art. Stamped using Vintage Photo Distress ink then outlined the letters with a white Signo Pen. Put that onto a piece of torn kraft paper and then added a piece of book paper. Grounded Teddy with some washi tape from stash.

P1080240

Macro shot of Teddy so you can see the bow and butterfly.

Hope you have enjoyed your visit today, thanks for dropping by and looking forward to your lovely comments.

xxx


Friday 20 March 2015

Darcy’s Calendar Challenge for March 2015

The wonderfully talented Darcy Wilkinson runs a monthly calendar challenge here. I do hope you can find time to come and join in!

Here are the techniques Darcy wants you to use this month:

1.. Keep a part of the original picture and incorporate that into your design

2, Technique -  use a candle or wax crayon as a resist

3. Add a title, using letters or words cut from a magazine/leaflet in a ransom style.

4. Blog your calendar page and link up from March 1st 2015

I designed my own calendar and have printed onto copy paper as i want to see how good or bad the techniques we are asked to use work on plain copy paper.

image

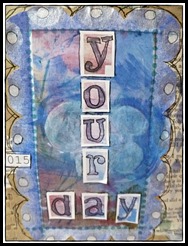
For March I chose one of my backgrounds from DLP 2014 which already has the words ‘your day’ on it. Printed out two copies and cut them out as i am adding the finished pages to a journal and not using it as a calendar.

The reason for two is that i am going to cheat and mount the words so they look like a ransom note.

P1080200

I managed to keep a little of the original picture but the crayon resist went terribly wrong. Think this was because i use Portfolio Pastels which react with water instead of using Crayola wax crayons.

Made the best of the problem but it doesn’t have the same definition i was hoping for.

Used stamps from my stash to add a border around the image and then cut out the words and mounted them onto copy paper then adhered to the page.

P1080199

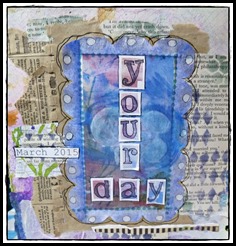
Above is the journal page i created, used some of the papers i had over from a recent workshop. Collaged the calendar image onto one of the pages of my mop up background journal, i really like how it has turned out.

So i had a play with the resist technique and i added a ransom style title which is the brief for March 2015.

I would like to enter this into the following Challenges:

Recycle, Re-Purpose & Re-Invent

Paper Artsy – Deconstruction

Hope you have enjoyed your visit today, looking forward to your lovely comments.

Thanks for dropping by.

xxx


Tuesday 17 March 2015

Pisces Tile

Hi Lovely followers hope you are all well today!

Over at the lovely Deborah Wainwright’s blog she has a Zodiac challenge and my tile has been made specifically for her but i would also like to join in with the following Challenges:

A Sprinkle of Imagination

Rhedd’s Creative Spirit

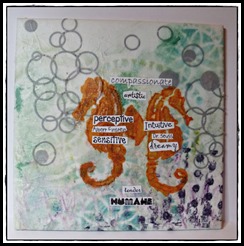
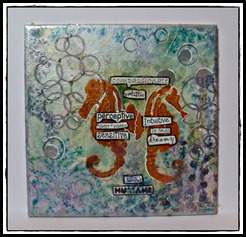
The tile is 5 x 5 inches and is from my stash, i have had them around 5 years. I have a need for a larger tile coaster for my OH, who just happens to be a Pisces.

P1080194

For the background i have used some very old hand made paper which i had stamped and stencilled onto. Adhered this to the tile using Claudine Hellmuth Matte Multi Medium, again i have had this in my stash for ages.

The loops are a stencil from Memory Box, used shiny patterned Vellum which look much better in real life than in the picture.

Added some texture to the background using a new tree and fence stencil from Glitzcraft. Then added the lovely Sea Horses and coloured them with DecoArt Americana Multi Surface paint in Pumpkin Patch.

IMG_2243

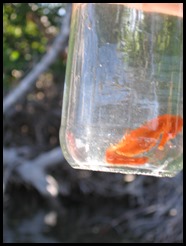
We were very privileged to see sea horses when we holidayed in the Caribbean many years ago, we visited a Mangrove on Isla Margarita.

Margarita Island is the largest island in the Venezuelan state of Nueva Esparta, situated off the north eastern coast of the country, in the Caribbean Sea. This is one of the pictures i took.

P1080198

Unfortunately i didn’t take any more images until i had finished the tile. If you zoom in you can see i used Teal Blue Stazon and Denim Adirondack ink pads to stamp the Inkadinkado Fluid Motion stamps.

The words were computer generated taken from an astrology site, they describe some of the traits of a Piscean. Do you know a Piscean with these traits?

I also found a few famous names who are born under this Sign, as you can see i added Albert Einstein and Dr. Seuss to the tile.

Went around the words with a black pen and highlighted around the bubbles and the sea horse with a white Signo.

The only thing left to do now is to spray the tile with a varnish to seal it and then it will be ready to be used.

Hope you have enjoyed your visit, thanks for dropping by.

xxx

Friday 13 March 2015

Too Late for Coffee

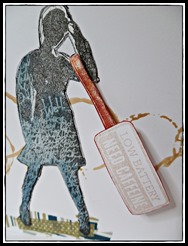
The lovely Keren Baker got me all excited about some Hero Arts stamps when she posted the fab card in the above link, i had to order them as i am a coffee drinker, even though it does look dreadful to most people as i have it so weak lol.

I received my stamps a couple of days ago and made this card only to find i am far too late to join in with the challenge that Keren had posted. Instead i will be sharing over at the fabulous Bleubeard and Elizabeth’s T stands for Tuesday and Craft Stamper, Any Stamp Challenge.

P1080149

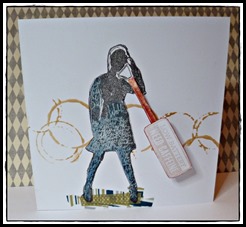
Used the Hero Arts low battery stamp for the tag that the Dina Wakley Silhouetted Women is wearing.

Coloured her dress using three different blue Distress Ink pads, blended as went along.

She has a tag so that she doesn’t need to tell anyone she needs caffeine, she just NEEDS A COFFEE NOW, no questions asked lol!!! Stamped the tag using Copper Brilliance Ink Pad.

P1080150

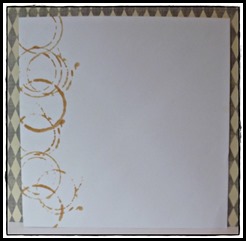
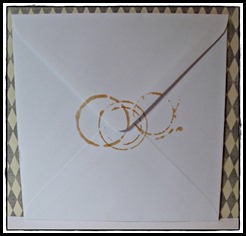
The coffee stains are from the Ronda Palazzari stencil mini well rounded. This is my most used stencil, it is used on almost all of my projects.

Grounded Grumpy Gertrude, as she is known in my house(just for now lol),using washi tape.

P1080151

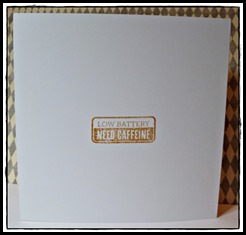
Repeated the stamping on the reverse of the card.

P1080153

P1080154

Applied Tea Dye Distress Ink through the stencil on the card and on both sides of the envelope.

Hope you have enjoyed your visit today, as always Thank You so much for dropping by, have a wonderful weekend.

xxx

Thursday 12 March 2015

SDC 186 Stars

The Stampotique Designers Blog theme for this week is STARS and has been chosen by Carol Fox, Here is what Carol has to say:
“Feature stars this week, one or more on your arty creation.  As part of your background or a main feature, it's up to you.  Just have fun with the challenge”.
I have really enjoyed looking at all of the DT’s creations this week, some of the quotes are so beautiful i do hope you go and see for yourselves, meanwhile here is my creation.
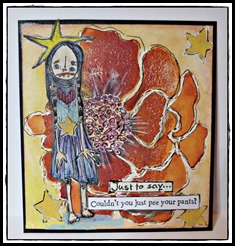
P1080144
The Marigold stencil is from Donna Downey. Now i am not a huge fan of red or orange but you have to use these colours if you want a marigold, right! I used DecoArt Multi Purpose paints in Pumpkin Patch and Red Barn.
Recently i used my Gelli Plate to create some washi tape and though it would use it again with the stencil. I didn’t do too well but managed to get a half impression on the first pull, this was because i used a piece of card from my stash that i have had for a long time not a piece of paper, really need to use up some of my stash! Filled in the gaps with Portfolio Pastels.
The centre of the flower was coloured using a baby wipe with one of the Portfolio colours on it through the stencil, this wasn’t too successful as the holes are very small, so to cover up the mess i went over them with Derwent Graphik Line Painter pens.
Doodled round the petals, which i won’t do again as i liked it without and added some little highlights of purple and white pen to the centre petals.
The background and the edges of the card were done with rust Portfolio Pastel and a baby wipe.
This is for my Friend Connie’s birthday, i purchased the Stampotique character Connie shows Off Her Nails last year and this is the first opportunity i’ve had to use her.
Coloured her in using Portfolio Pastels and Graphik Line Painters, fussy cut her out and added a star to her. A black Stabilo All pencil outlines her to add a little depth.
My Friend has a wicked sense of humour, she will be 83 this year, i know she will lol at the sentiment.
Added some stars that were over from a project i made last year and then mounted it onto black card.
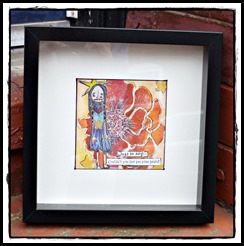
P1080147
Instead of making this into a card i decided to use a RIBBA IKEA box frame and make it into a card/gift.
I would also like to enter into the following challenges:
Thanks for dropping by, looking forward to your lovely comments.
xxx

#decoartprojects

Tuesday 10 March 2015

SDC185 Numbers or a Number

Jackie Payne is our hostess here on Stampotique Designers Blog this week and she's got numbers on her mind:
Numbers have been around for a very long time!  They feature so much in our lives!  I would like you to incorporate a minimum of one number into your project!  I hope you have fun.

It is my OH’s birthday in the next couple of days and he won’t see this post which is why i am able to enter into this weeks Stampotique Challenge!

P1080086

The card is an A5 size and very heavy cardstock. Tried to splodge the Brushed Pewter Distress Stain over the background but it only gave me some dots, i have just about managed to capture them on the last image above.

Flicked some of the Prima Bloom Precious Stone spray from the stem of the spray as i struggled to use the spray that way, i like the contrast on top of the Pewter shine.

P1080087

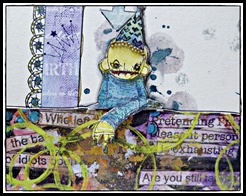
Added the lilac coloured border and then doodled around it using the Graphik Line Painter Pens.

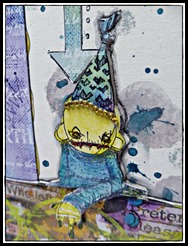
Adhered the band over the top and then added Tinglyitchiness with his Happiness Hat over the top.

P1080102

Placed the arrow above Tingly’s head and then wrote Birthday Boy and added the small 49.

Tingly was coloured in with Graphik Line Painters and then DecoArt Soft Varnish over the top, he feel wonderful.

Supplies used:

8 x 10 Gelli Plate

Dyan Reaveley Laugh Until you Leak Stamps Set

DecoArt Mixed Media fluid Acrylic Paints

DecoArt Soft Touch Varnish

Stampotique Daniel’s Happy Head Appliances Cube

Stampotique Tinglyitchiness

Graphik Line Painters

Brushed Pewter Distress Stain

Old stash birthday border and arrow

Prima Bloom – Precious Stone

The belly band from the card was so much fun to make, i blogged about the technique and where to watch the Gelli Arts video here.

I do hope you enjoyed your visit today, am looking forward to your lovely comments.

Thanks for dropping by.

xxx

Sunday 8 March 2015

Mixed Media World Challenge 1 Anything Goes

Hello and welcome to my first post for our newly designed and renamed blog, we were called The Speed Craft Challenge, we are now Mixed Media World.

MMWMAIN badgecrop 

Our Design Team remains unchanged but with the addition of the VERY talented Georgie C, welcome Georgie, so glad to have you on board!

  Head over here to see the wonderful Mixed Media creations my Team Mates have all created.

Please note the new rules, i hope to see you joining in and having lots of fun with our new Challenges.

GlitzCraft is our sponsor for this challenge. The prize for the winner will be a £20 voucher to their store and the winner will be featured in MMW gallery and then invited to guest design the following month.


Here is my Anything Goes Project
P1080069

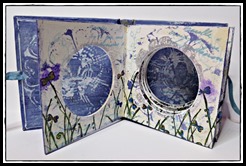
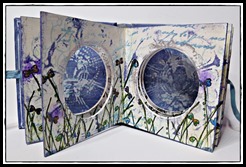
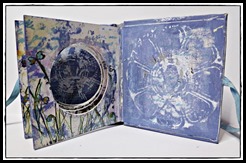
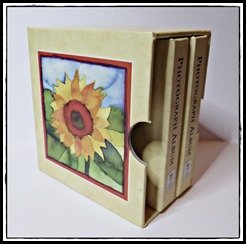
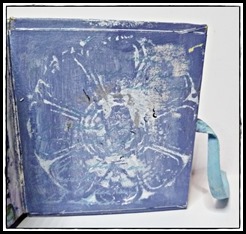
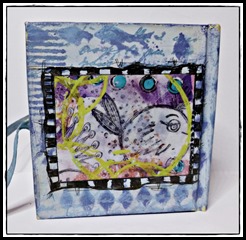
Been having a clear out of my crafting stash, not been done for over 10 years, one of the things i discovered were 4 sets of photograph albums. These come in a box and have 3 different albums for you to fill. Mini album is 3.5 x 3.5 inches and has 5 pages.
P1080070

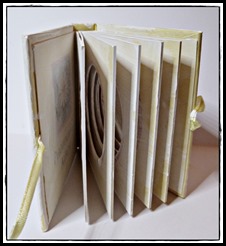
I have only altered one so far as i wanted to see how it would turn out. The pages have been covered in DecoArt Americana Chalk Paint Everlasting.

Added some Pan Pastel colours over the top, think i used Turquoise and Yellow Green mixed together.

Recently i purchased a couple of the New Paper Artsy Fresco paints called, Blueberry, Purple Rain and Smurf, i am so in love with them!
P1080074

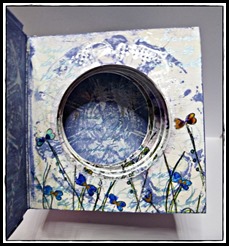
Using the above colours i painted the front, back and around each of the pages with a mix of the Purple Rain and the Blueberry.

For the back and front inners used Snowflake Fresco Paint and the Rebekah Meier stencil Gothic Romance.

Over the top of this i used the script stamp from Sara Neumann plate ESN05 and used Pearl Sky Blue Brilliance ink pad.

I also used the large flower stamp from Paper Artsy Hop Picks HP1004 to cover the centre of the stencil using Brushed Pewter Distress Stain directly onto the stamp.

I love all the shine which i don’t think you can see in the picture.
P1080076 

P1080077

P1080078

P1080079

P1080080

P1080083

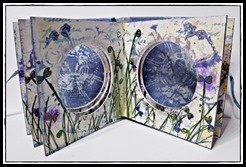
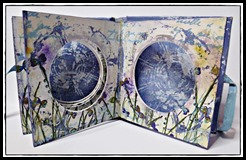
The above pictures show each page as it opens, i am loving all the colours!

Each of the pages has been coloured and stamped exactly the same but haven’t been careful just a little bit slapdash with the stamping, didn’t want a uniform look more of watercolour/distressed.

Each page has Darcy Wilkinson grass border from plate EDY07 and the leaves from Paper Artsy Flora and Fauna SIFF3. The colouring off these elements has been done with my wonderful Derwent Graphik Line Painter Pens.

Started by stencilling the Gothic Romance stencil using a mix of the Blueberry and Purple Rain paints over each side, then adding Brushed Pewter to the large flower stamp and directly stamping over the aperture, then adding the leaves and finally the flowers.
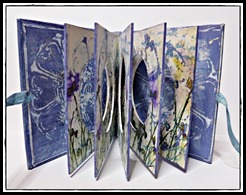
P1080071

Also coloured the ribbon using Smurf Fresco Paint and stamping over using the flower stamp and the distress Stain.
P1080072

P1080073

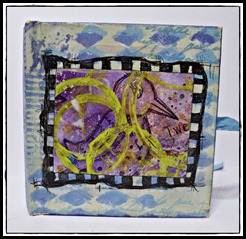
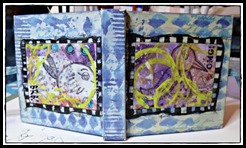
The front and back of the Photograph Album have been created by using the new Mixed Media dies from Tim Holtz and turning them into stencils painting through the diamond corner. Also used the new Ronda Palazzari Mini Textures Stencil on the edges of the page.

Stamped the script stamp from Sara Neumann over the top of the diamonds, then added a white pen mark to lif the edges.

The images are from a Gelli Plate Transfer Film Technique i tried and posted about here.

Doodled the frames, i like this design and how you don’t always have to be completely accurate.
P1080100

After a couple of days i added 3 layers of the DecoArt Ultra Matte Varnish over the top of the covers, this has helped to get rid of the shine from the tape and help the images to blend in more with the background.

Also added a small stamp to the front and the back cover from Rubber Dance.

That was one huge post, phew i hope you are still here with me.

Don’t forget to join in with our new Mixed Media World Challenge, Anything Goes for March.

I would like to enter my project into the following Challenges:

Paper Artsy – Miniatures

Country View challenges - Anything Goes

Pan Pastels – Stencils

Looking forward to your comments and thank you for dropping by.

xxx
Friday 6 March 2015

Winner of Blog Candy

Hi Everyone sorry for the late posting of this information, i completely forgot to let you know that there was a draw to see who won a surprise crafting prize after i reached 100 followers.

The winner is Gay Peplow. Well done Gay you are my number 41 follower, your prize has been posted today and should reach you within the next few days.

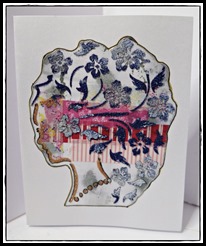
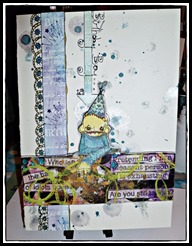
While i am here wanted to share a card i made while having a play with Glitzcraft Satin Frosting and a new stencil i got from them recently. Wanted to see if the glitter frosting would adhere onto washi tape, yes it does and here is the card.

P1080089

After the paste dried i cut out the shape of the head and added it onto a white card base, added a line using a Stabilo All Pencil to add a little depth.

Hope you like the quick card i made.

Thanks for dropping by.

xxx
Gelli Plate-Transfer Film Technique

Found A Gelli Arts video on You Tube showing a fantastic technique called Gelli Transfer Film. Once i had seen this i had to play!

I got out my 8 x 10 Gelli Plate and followed the instruction from the video, used my own colours, textures and a different tape, I used clear Repair Tape from Unibond.

All the paints i used are from two different DecoArt ranges, Americana Multi-Surface and the Media Line.

Used the new Catalyst Wedge No 4 to create some of the lines, two different glass jars to add the circles and a mini stamp from the Finnabair mini clear range called Dot Grunge. Also used the end of a rolled up piece of paper to add the black dots and a paint brush handle to add the turquoise dots.

Used a new to me Rebekah Meier stencil Gothic Romance as one of the textures on the Plate.

I didn’t take any pictures during this process as you can see a step by step on the video, plus i had mucky hands and didn’t want to get this on my camera lol.

After i removed the tape from the Plate i added different mediums over the clear sticky areas.

P1080048

Number one had Perfect Pearls dusted over the remaining area.

P1080049

Number two has baking foil on the whole of the area.

P1080050

Number three wasn’t on the video, i used some of the metal tape i had embossed and burnished the Gelli printed tape over the top.

P1080051

Number four was partly on the video i added the gilding flakes and then i added thick card stock sentiments from the new Dyan Reavely stamp plate Laugh Until You Leak onto the back and then added a napkin over the back of that. I should have stamped the words onto tissue paper, another lesson learnt. You will see this feature in another project very soon.

P1080053

Number five wasn’t on the video and i as you can see i had already cut the tape up as i have used this in a project you will see very soon.

I stamped the new chicken plate from Lin Brown in black Archival Ink onto very thin paper, not tissue a little stronger more like deli paper and i stuck the Gelli print over the top, really love this one too.

P1080047

Number six wasn’t on the video, this was the last piece on the Gelli plate, it was so small so i used a thinner tape to remove it and then added the same napkin i used on some of the above tapes.

P1080052

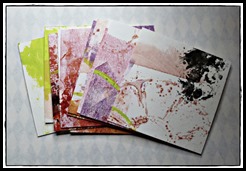
This is the mop up page from playing with the different acrylic paints, i cut it up into 2 inch squares so i can make a mini book sometime.

Hope you have enjoyed your visit today, looking forward to you lovely comments.

Thanks for dropping by.

xxx